Hej hej,
I bet you
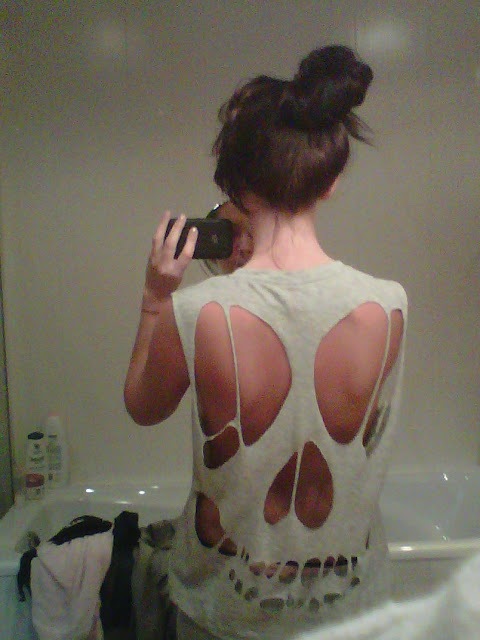
guys know those shirts with the shapes of a skull cut out on the back, right? They
seem to be pretty popular lately. They’re easy to make yourself as long as you’re
patient and perfectionistic. So that’s what I did today, making my own shirt,
ahah. It took me moreless 3 hours and I’m satisfied with the result, I expected
worse!;p I’ll tell you how I did it.
Some days ago I bought a shirt at H&M, it
was only 9 euro and I bought it a couple sizes too big because I like it more
loose for this type of shirts. But that’s all about personal taste, ofcourse.
First of all, I drew each and every single part of the skull out on paper to
see if the size matched with the shirt. I started with the eyes because they’re
the biggest part of the skull, then with the nose and then the teeth. After this,
I cut it all out and pinned every single piece of paper onto the shirt (even
the smallest teeth!) to be sure everything was in the right place and to be
sure there was enough space between each part. (make sure your shirt is made
out of a decent fabric so it won’t get ripped apart once you start cutting!)
Once the
parts are mounted on the paper, take a pen and trace the pieces carefully so
there are perfect shapes. Once this is done, take off all the pieces again and
then just start cutting out everything. Make sure you’re careful and precise,
like this the result will be just like you expected. J


0 comments:
Post a Comment